

How To Clean A Hp Pavilion Dv7 Laptop Fan
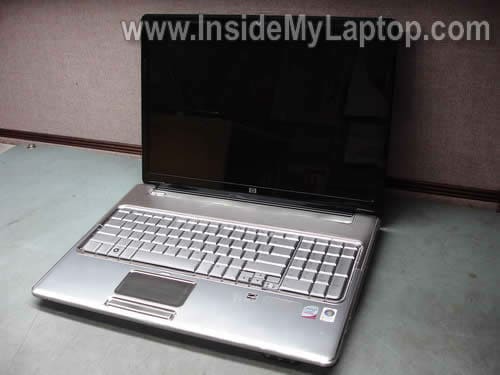
In this guide I explicate how to disassemble an HP Pavilion dv7 notebook.
This is my first disassembly guide for HP pavilion dv7 series.
To be precise, I'g taking autonomously an HP Pavilion dv7t-1000 model.
I found that HP Pavilion dv7 notebooks come in unlike torso types. If your calculator doesn't look like one shown in this guide, bank check out:
– dv7-4000 serial disassembly guide
– dv7-6000 series disassembly guide
– dv7t-3000 disassembly guide (also works for HP dv7-2000).
Before you lot outset, turn off the estimator and remove the bombardment.
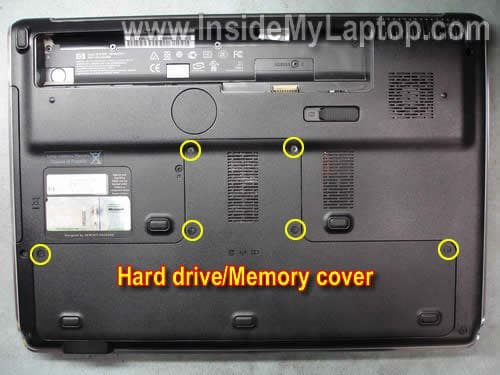
Step 1.
Remove (loosen) 4 screws securing the hard bulldoze and memory cover. Remove the cover.
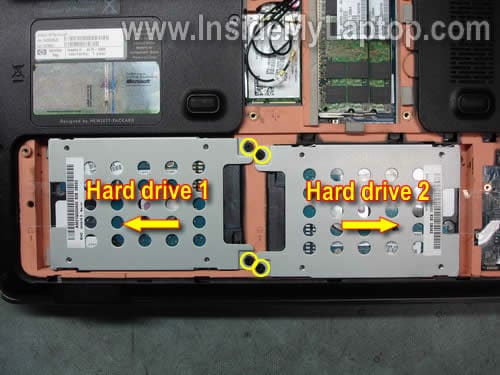
Footstep 2.
Remove four screws securing difficult drives (two screws per hard bulldoze).
Slide the HDD 1 to the left until it's asunder from the motherboard and remove it.
Slide the HDD 2 to the correct until it's disconnected from the motherboard and remove it.
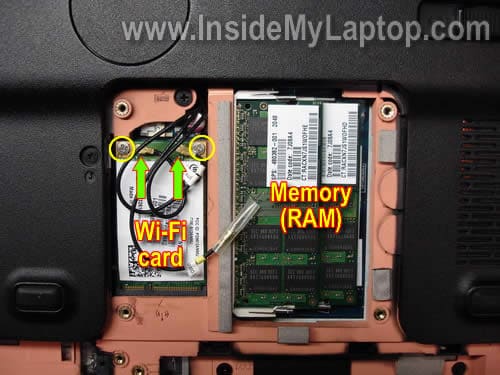
Stride 3.
Remove both memory (RAM) modules.
Disconnect two antenna cables from the wireless carte du jour. These laptop has three antenna cables but only two are used.
I of the antenna cables connected to the primary contact on the wireless card and the 2nd one is connected to the auxiliary contact. All three antenna cables are labeled.
Remove two screws securing the wireless card. Remove the card.
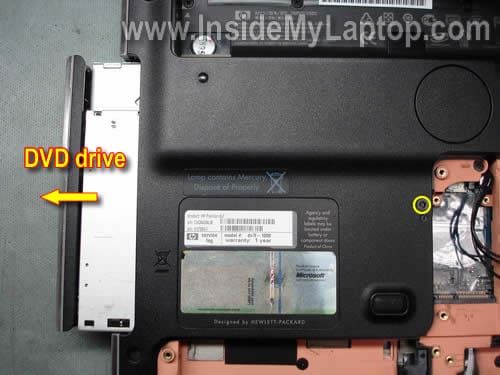
Step 4.
Remove one screw securing the CD/DVD bulldoze.
Slide the CD/DVD drive to the left to disconnect it from the motherboard.
Remove the CD/DVD bulldoze.
Pace 5.
Remove all marked screws from the bottom instance.
The light-green circled screw secures the keyboard.
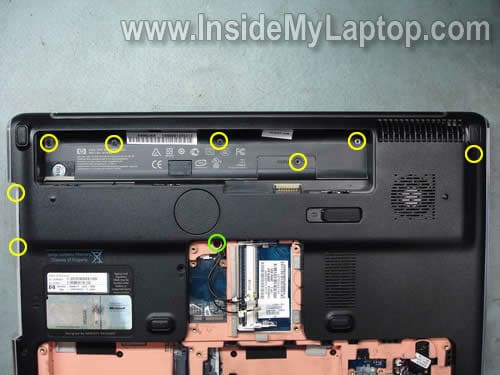
Don't forget to remove 2 screws hidden in the CD/DVD drive bay.
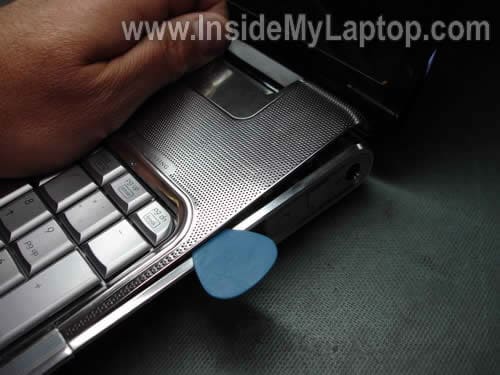
Stride 6.
Get-go separating the speaker cover from the top cover.
You tin use a guitar pick as a case cracker. Insert the guitar pick between the speaker cover and example and slowly motion forth the side.
Pace 7.
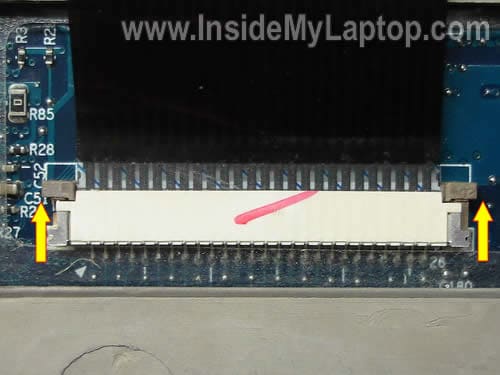
Lift up the speaker encompass. Be careful, information technology'southward still connected to the motherboard.
In guild to remove the cable, yous'll have to unlock the connector first.
Move the brown clip about ii millimeters in the direction shown by two arrows. The clip must stay attached to the connector base.
On the picture below the connector is shown in the unlocked position.
Pace 8.
Now you tin remove the speaker cover.

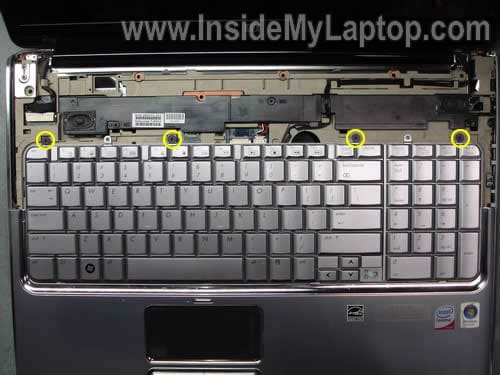
Stride nine.
Remove four screw securing the keyboard.
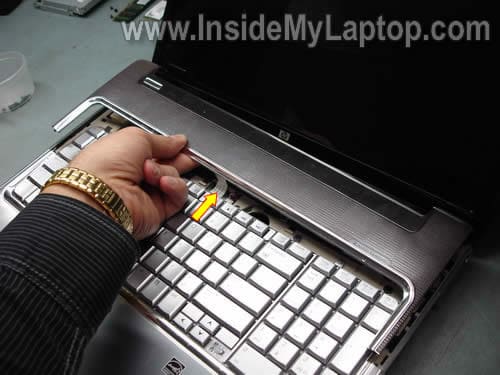
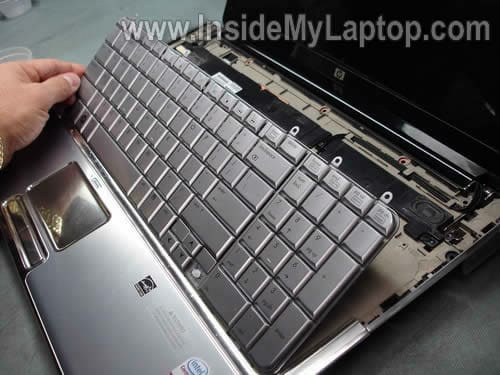
Pace x.
Elevator up the keyboard from the base of operations and admission the cable connector underneath.
Replacement keyboards available hither: https://ebay.to/2UEtrM9
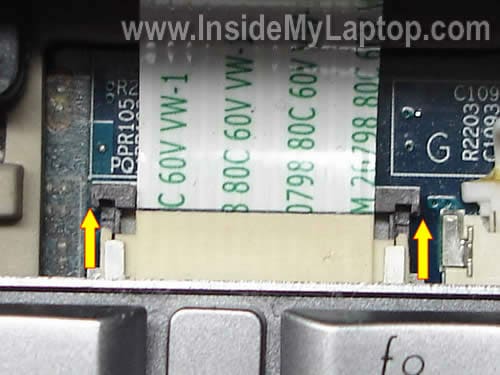
STEP 11.
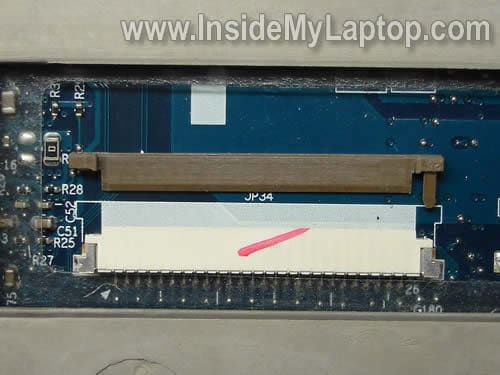
Carefully unlock the keyboard cable connector.
Move the brown clip well-nigh 2 millimeters in the direction shown by 2 arrows. The brownish clip must stay attached to the connector base.
If yous harm the connector, the keyboard will non piece of work.
Well… I bankrupt the connector.
Every bit yous see, the left pin on the brown prune is missing.
Information technology's still possible to employ this clip to lock the connector.
Pace 12.
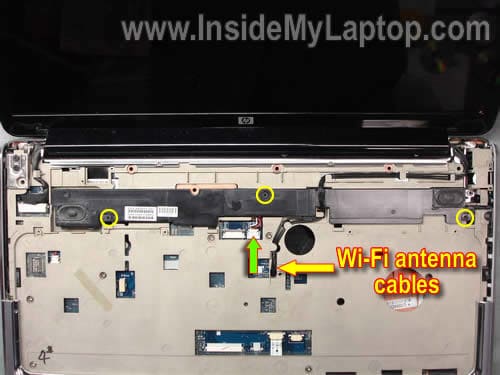
Pull Wi-Fi antenna cables though the opening in the cover.
Remove 3 screws securing the speaker assembly.
Disconnect the speaker cable (green arrow) from the motherboard.
Footstep 13.
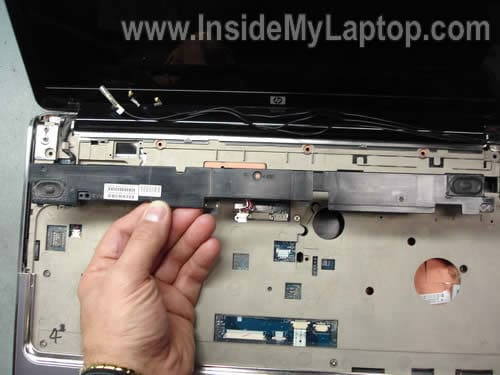
Remove the speaker assembly.
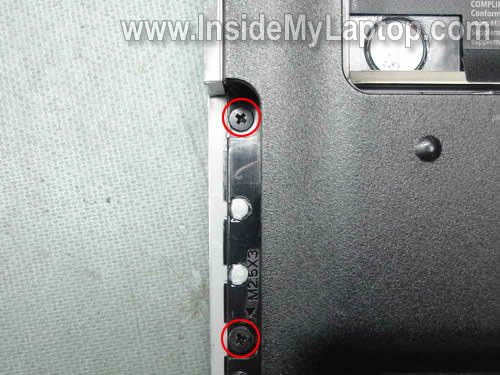
Step 14.
Disconnect the video cablevision from the connector on the motherboard.
Remove 6 screws securing display hinges (3 screws per hinge).

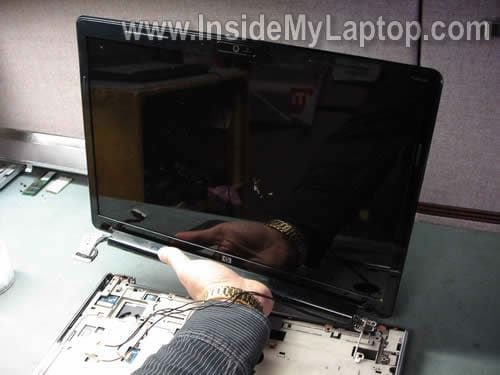
STEP xv.
Carve up the display associates from the notebook base of operations.
In the next postal service I will explain how to remove the screen.
By the way, information technology'due south not necessary to separate the display console assemble from the base in order to take it apart.
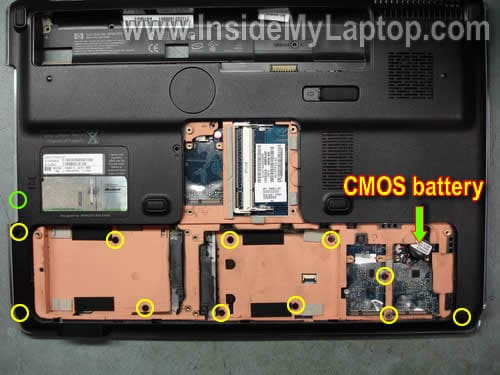
Pace 16.
Disconnect and remove the CMOS battery.
Remove all marked screws from the bottom. The green circled screw is hidden in the CD/DVD drive bay.
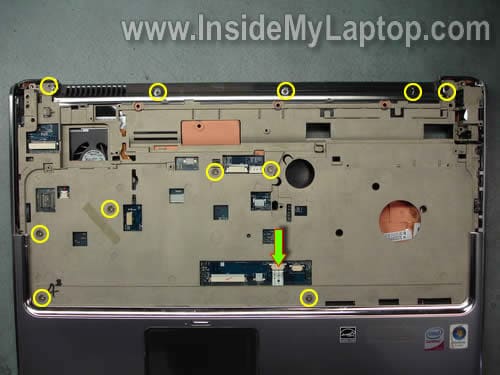
Pace 17.
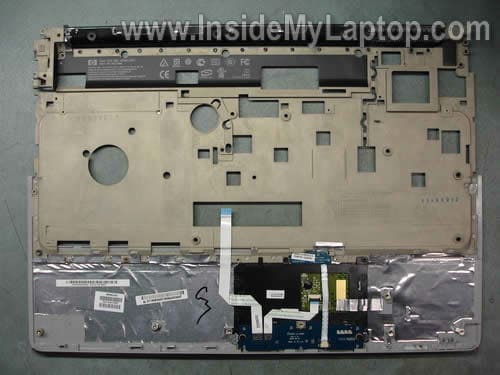
Remove all screws securing the tiptop comprehend assembly.
Disconnect the touch pad cable from the motherboard.
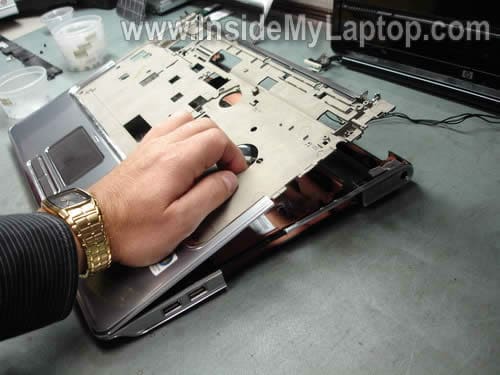
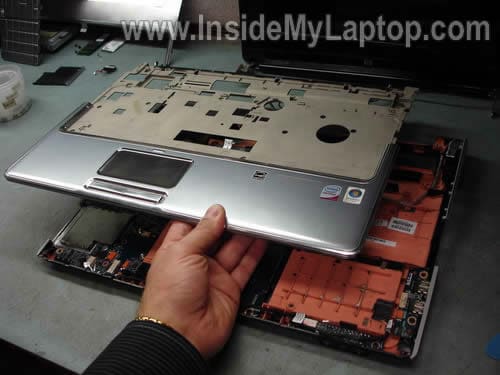
Stride 18.
Start separating the elevation cover assemble from the notebook base of operations.
Y'all can utilise same trick with the guitar pick shown in the step vi.
Stride xix.
Remove the top encompass assembly.
Here'southward the back side of the top comprehend assembly.
STEP 20.
Disconnect the USB and audio board cables from the motherboard (green arrows).
Disconnect the cooling fan cable from the motherboard (xanthous pointer).
Remove four screws securing the motherboard.

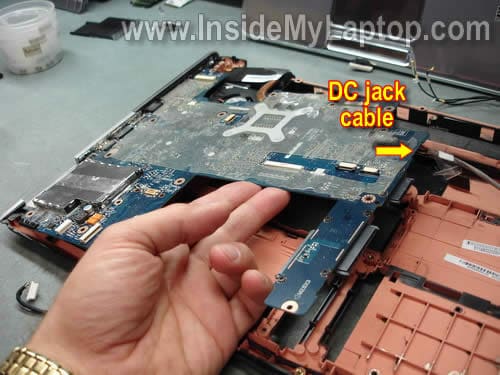
STEP 21.
Lift up the right side of the motherboard as it shown on the picture below and disconnect the DC-IN jack cablevision.
STEP 22.
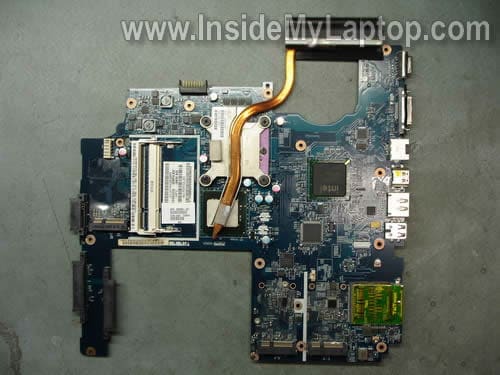
Remove the motherboard from the notebook base of operations.

On the contrary side of the motherboard you can access the processor (CPU) when the oestrus sink is removed.
Replacement motherboards available here: https://ebay.to/2UFviAh
By the way, the best manner to find a replacement motherboard is searching by the HP function number. The function number should exist located on a sticker in the memory compartment. The HP part number looks like XXXXXX-001.
Here's the bottom instance without motherboard installed.
The USB lath, audio board, cooling fan and DC-IN jack are mounted on the base.
The DC jack attached to a harness.
New DC jacks bachelor hither: https://ebay.to/2SzrgXC
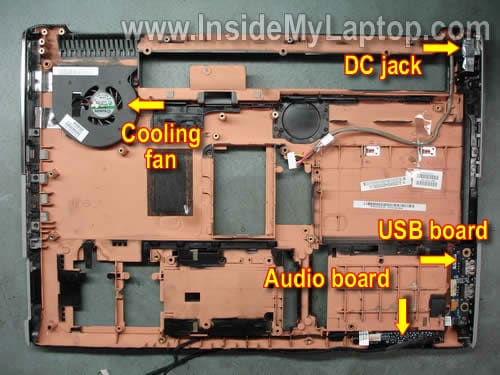
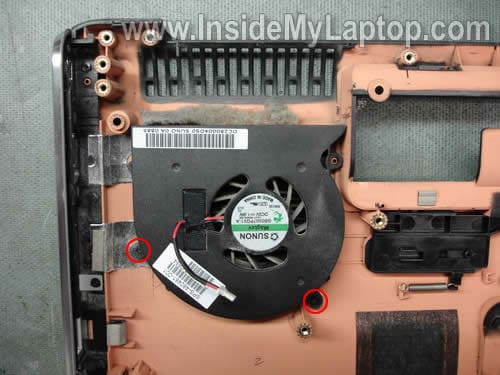
In order to remove the cooling fan, simply remove two screws securing the fan.
Every bit you encounter, the cooling fan is dusty and has to exist cleaned.
Replacement fans bachelor here: https://ebay.to/31LQKFg
UPDATE:
There are only two fans listed in the service manual for HP Pavilion dv7 series. They are listed on the folio 27.
488885-001 for notebooks equipped with AMD processor.
480481-001 for notebooks equipped with Intel processors.

Source: https://www.insidemylaptop.com/disassemble-hp-pavilion-dv7-notebook/
Posted by: costablospas.blogspot.com
0 Response to "How To Clean A Hp Pavilion Dv7 Laptop Fan"
Post a Comment